Learn how to install and wire various industrial radio remote controls. Our guide, using the F21-E1B model as an example, provides detailed steps, images, and videos.
- Introduction to Installing and Wiring Industrial Radio Remote Controls.
- Required Tools and Materials.
- Safety Precautions.
- Installation Steps Using the F21-E1B as an Example.
- Video Tutorial for Installing Industrial Radio Remote Controls.
- Common Troubleshooting Tips.
- Upgrading Your Old Equipment.
Introduction to Installing and Wiring Industrial Radio Remote Controls
In this guide, we will introduce the general steps and considerations for installing and wiring industrial radio remote controls.
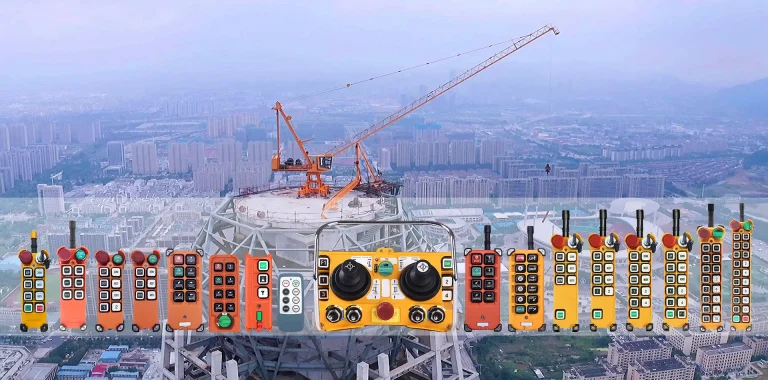
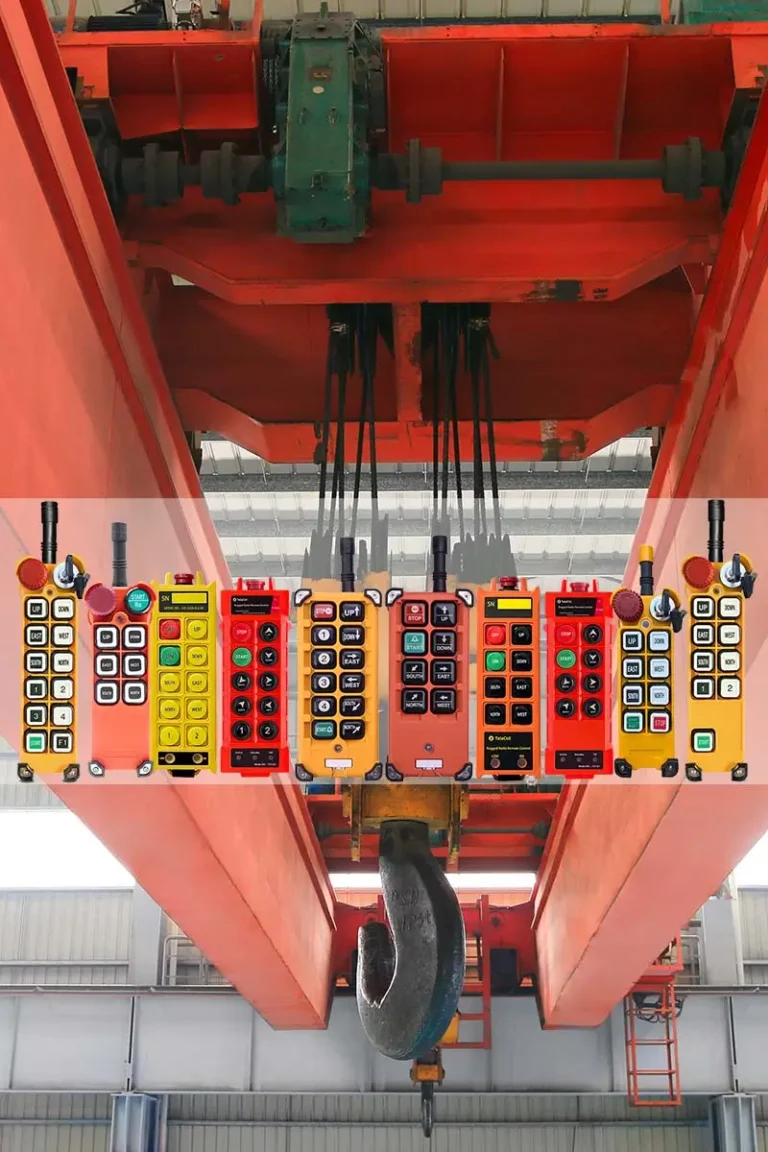
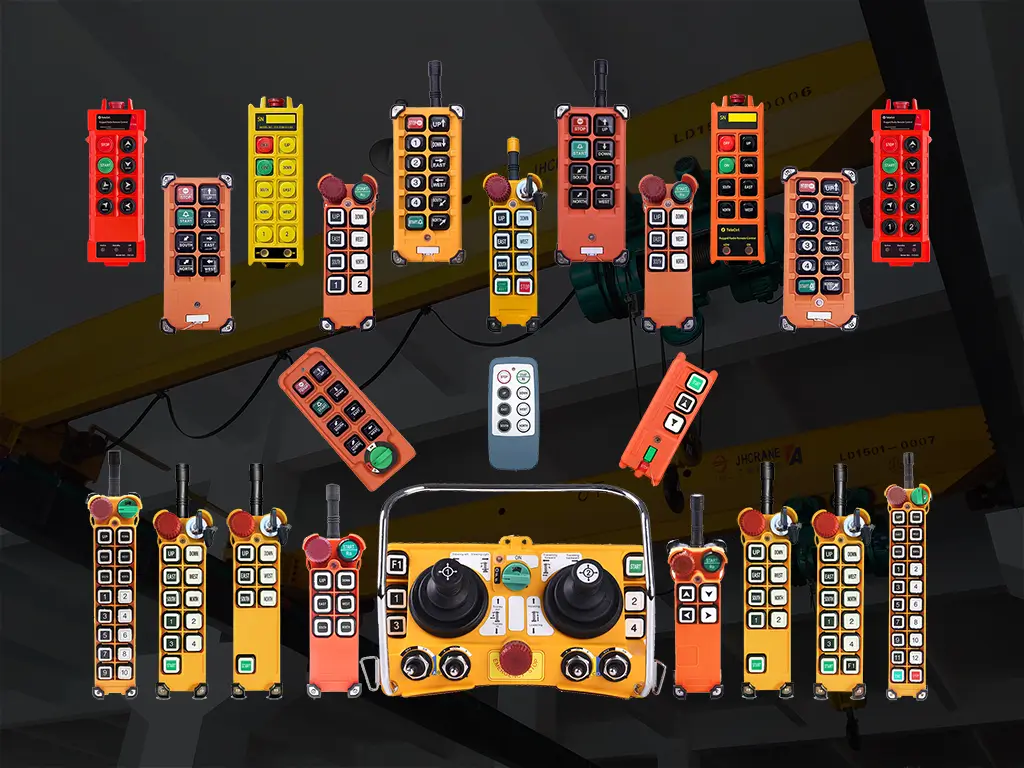
There are many different models of industrial radio remote controls, and their installation and wiring methods vary depending on factors such as the number of buttons, single-speed or dual-speed functions, and whether a joystick is included. You can learn about the specifications of different models on the “Industrial Radio Remote Control” page.
The application fields of these remote controls are also diverse. Different applications have varying wiring methods and function settings based on their functional requirements. If you want to learn more about the industry applications of industrial radio remote controls, you can click here.
While specific models or applications may have unique installation requirements, the overall process is similar. We will use the most common industrial radio remote control model, F21-E1B, and its typical application as a bridge crane remote control, as an example to demonstrate the detailed installation and wiring steps.
Required Tools and Materials
Before starting the installation, prepare the following tools and materials:
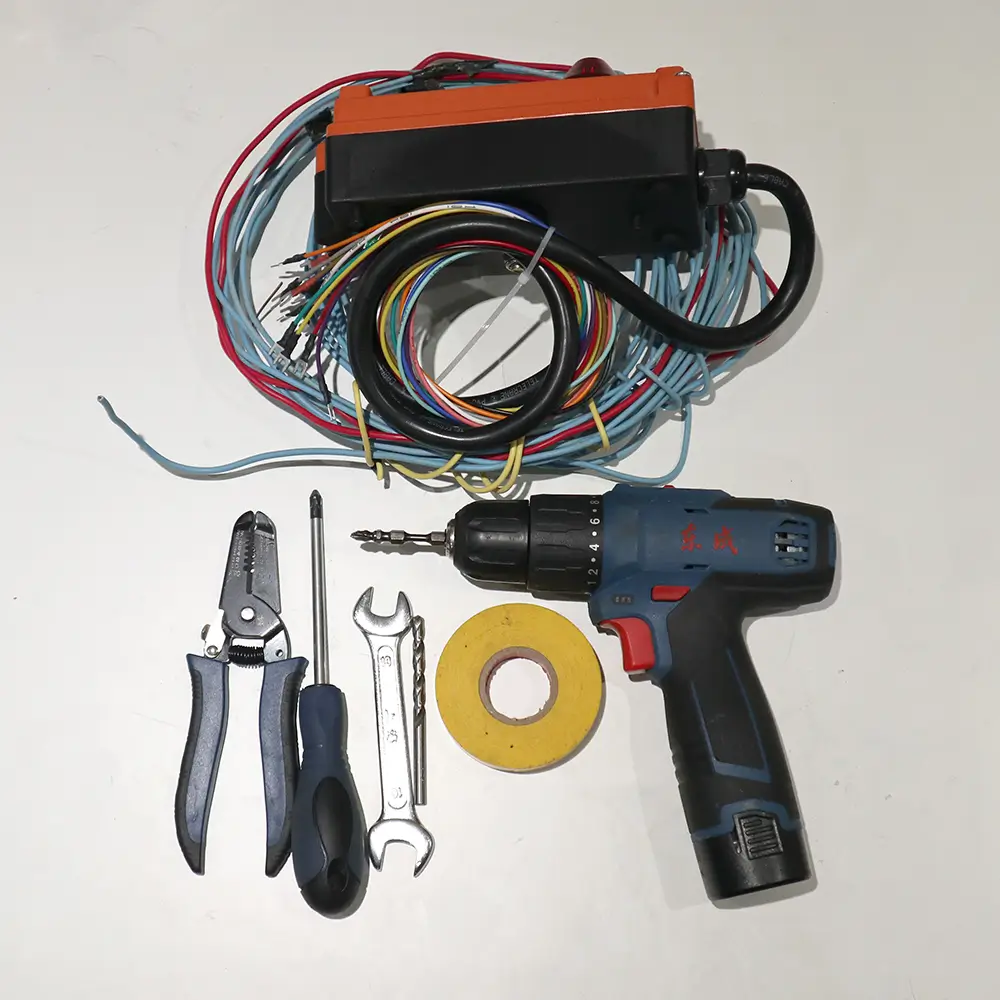
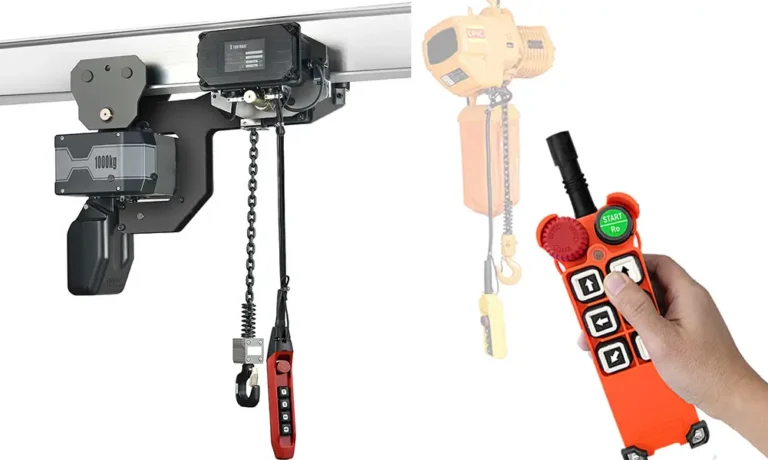
- F21-E1B radio remote control kit (including transmitter, receiver, and user manual)
- Screwdrivers, Hex wrench, Electric drill, wire strippers, and other common tools
- Insulating tape, Power and connection cables
- Safety equipment (such as gloves and safety glasses)
- Mounting brackets (optional)
Safety Precautions
Ensuring safety is paramount before installation and wiring. Please follow these precautions:
- Do not install the equipment without proper safety and professional training.
- Ensure the power is turned off before beginning.
- Use appropriate personal protective equipment (PPE).
- Follow the manufacturer’s guidelines and local electrical codes.
Installation Steps Using the F21-E1B as an Example
Step 1: Inspect the Equipment and Accessories
- Before starting the installation, check the remote control kit for completeness.
- Ensure all accessories (such as antennas, power cables, connection cables, etc.) and tools (screwdrivers, wire strippers, etc.) are present.
- Confirm that the equipment to be installed meets the installation conditions, can be used normally, and is free of safety hazards such as leakage.
- Ensure the voltage of the equipment matches the installation voltage of the remote control receiver.
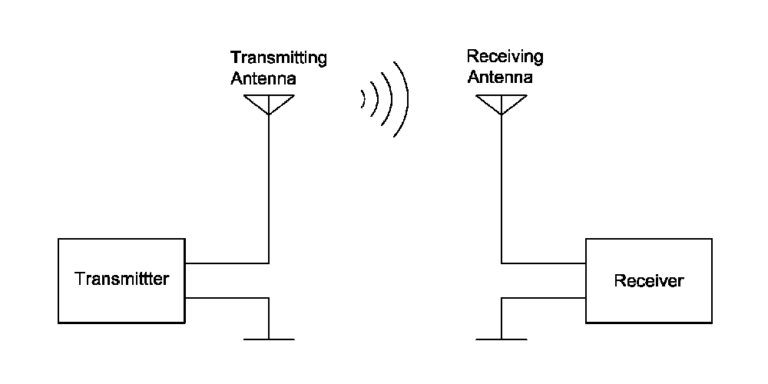
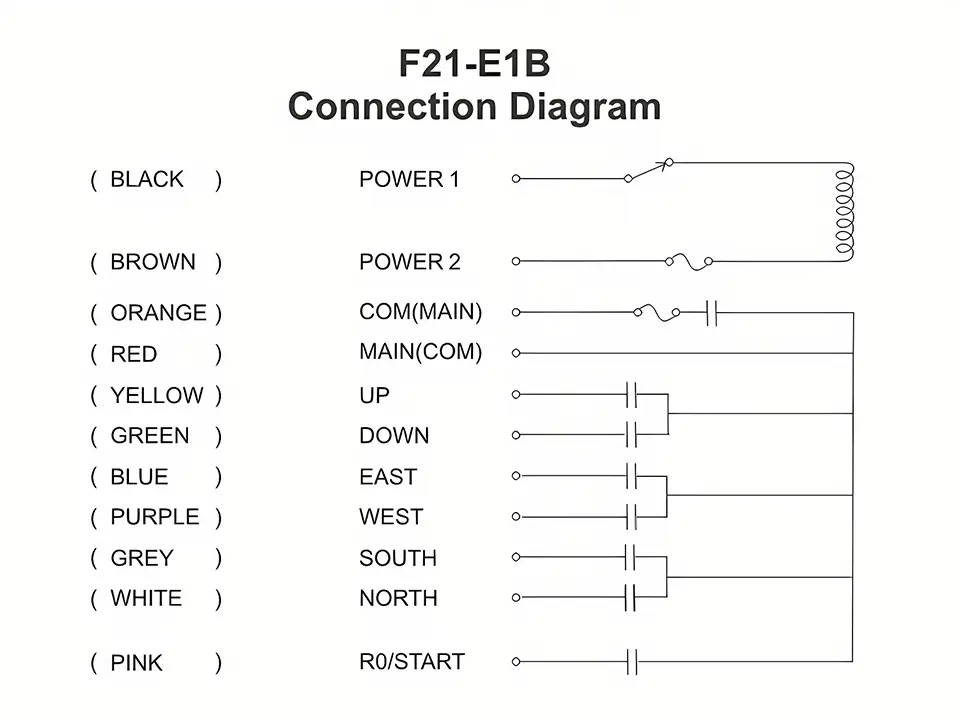
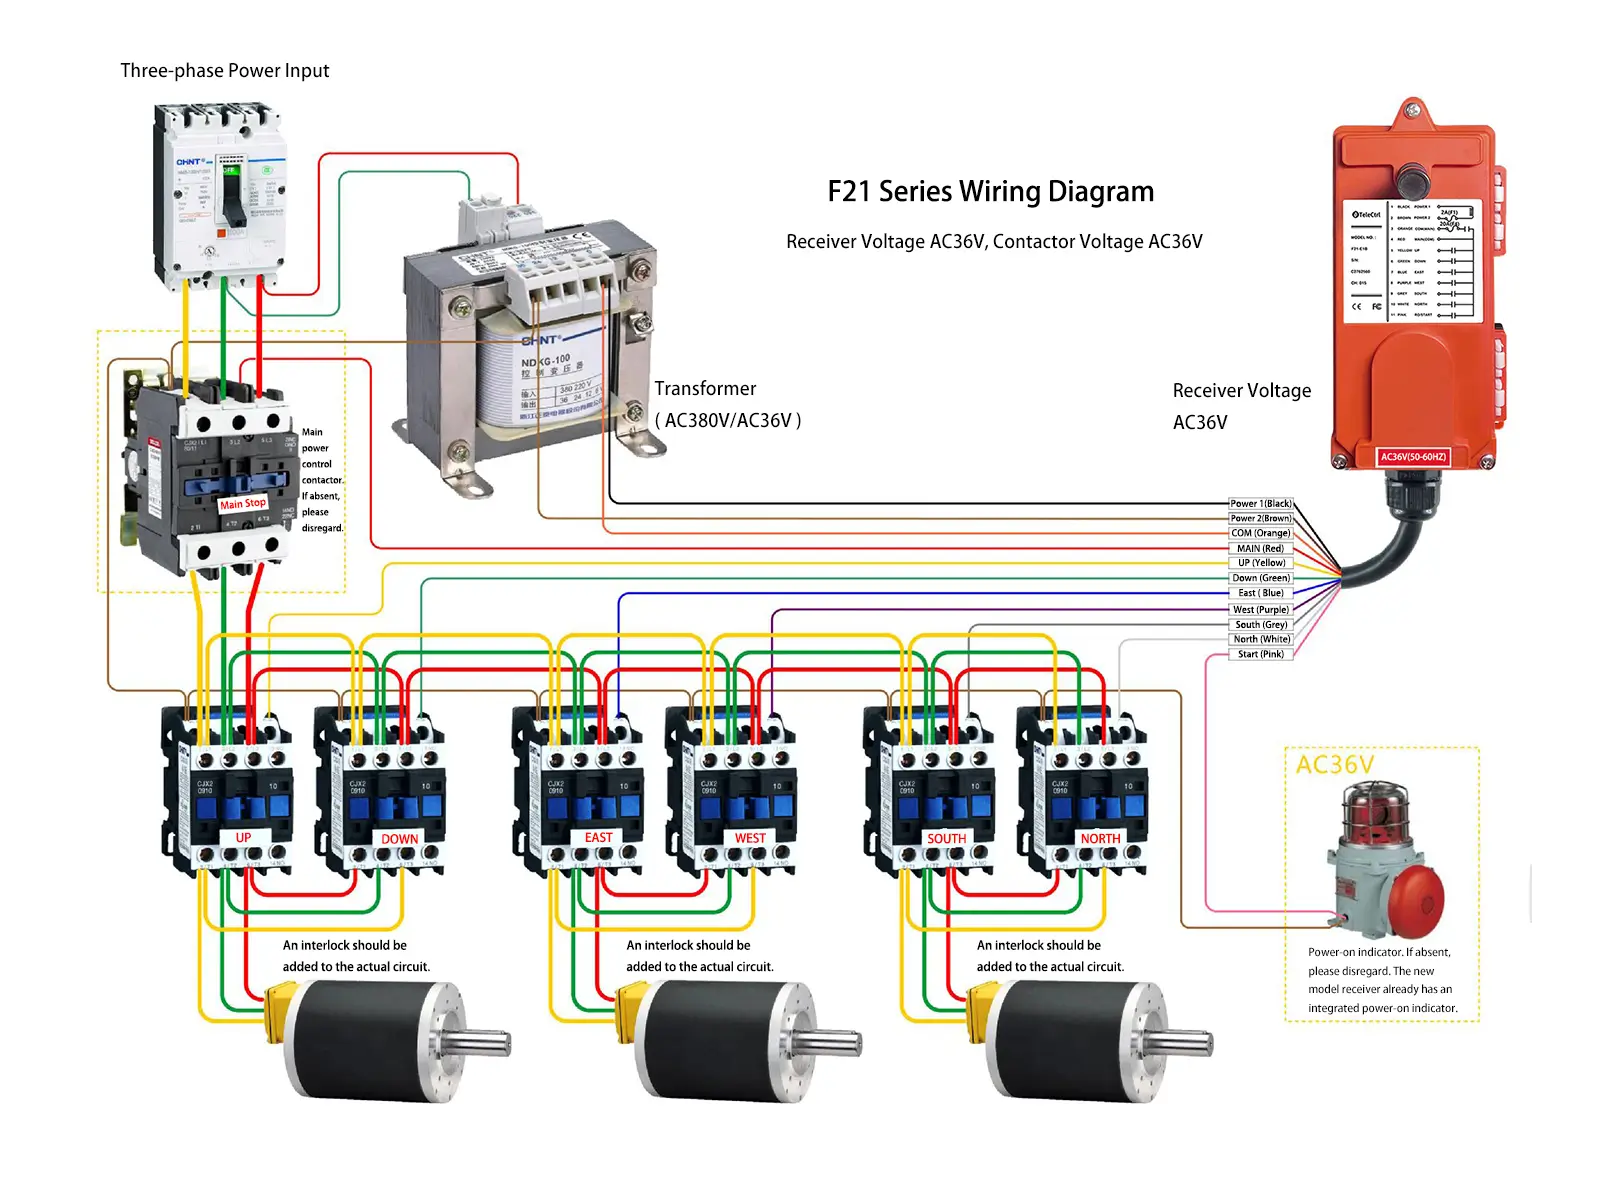
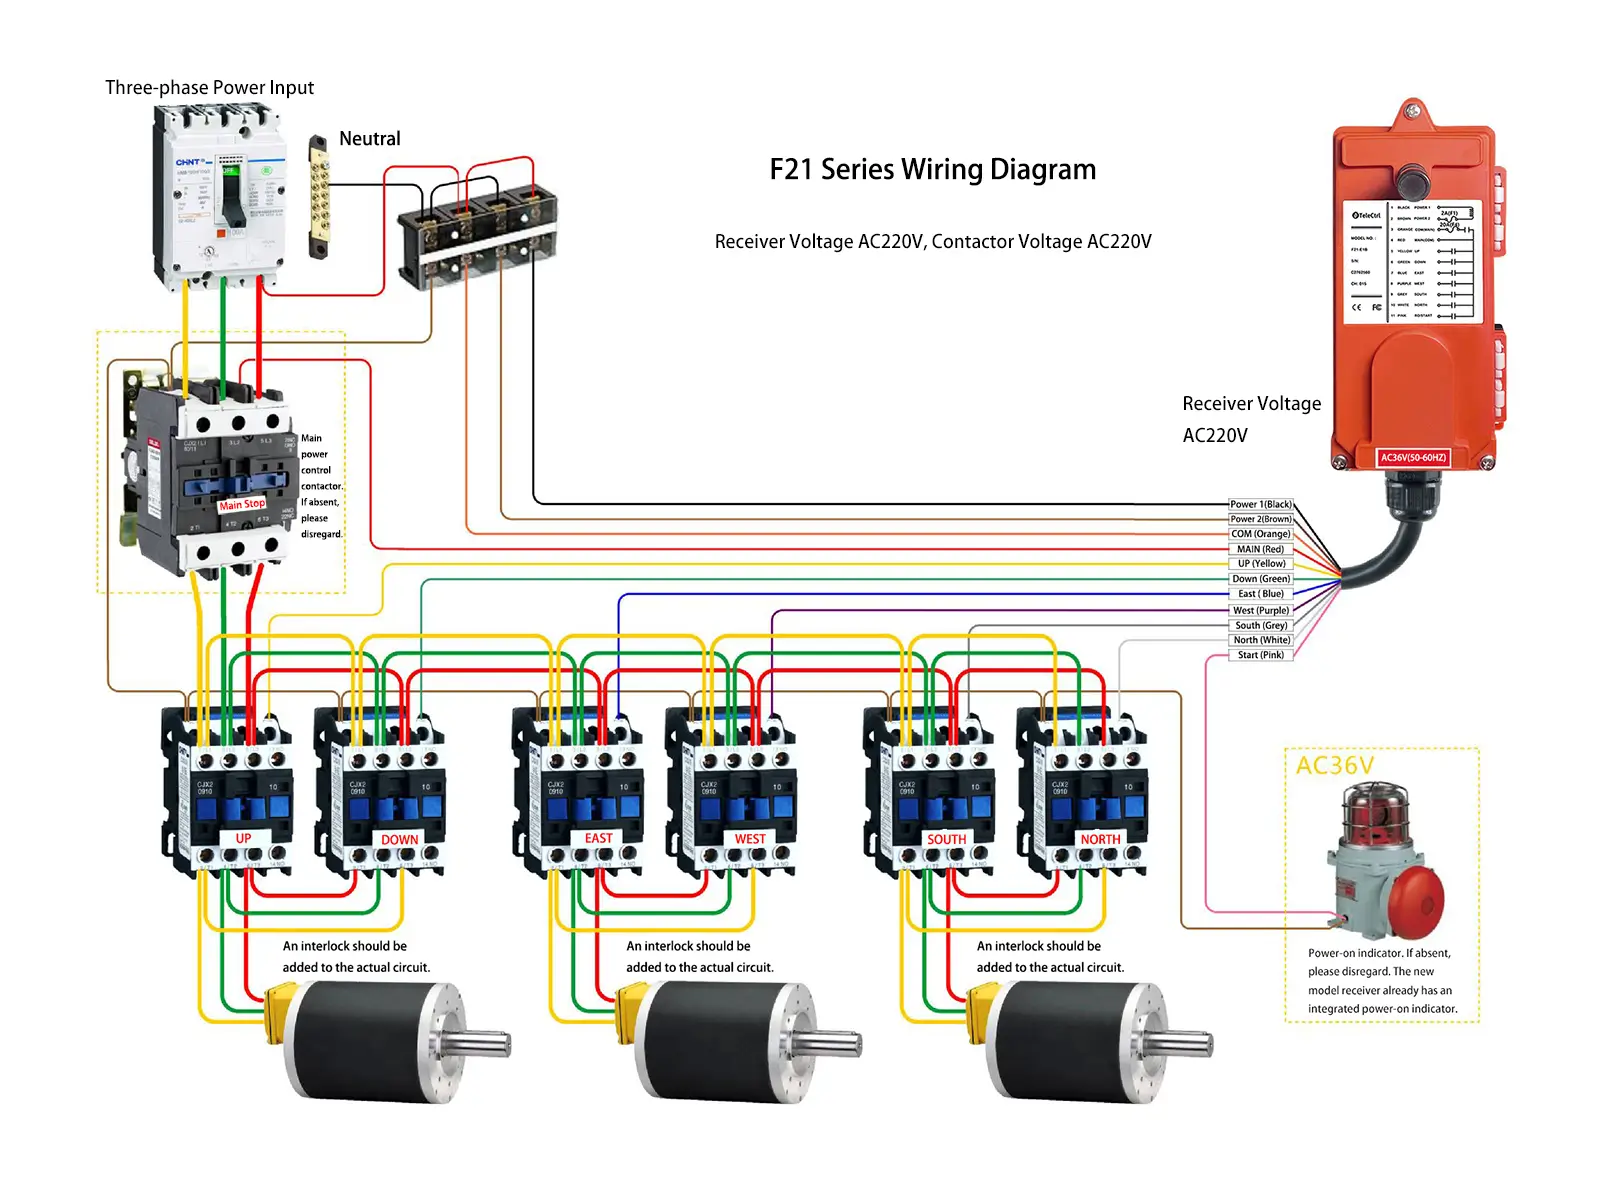
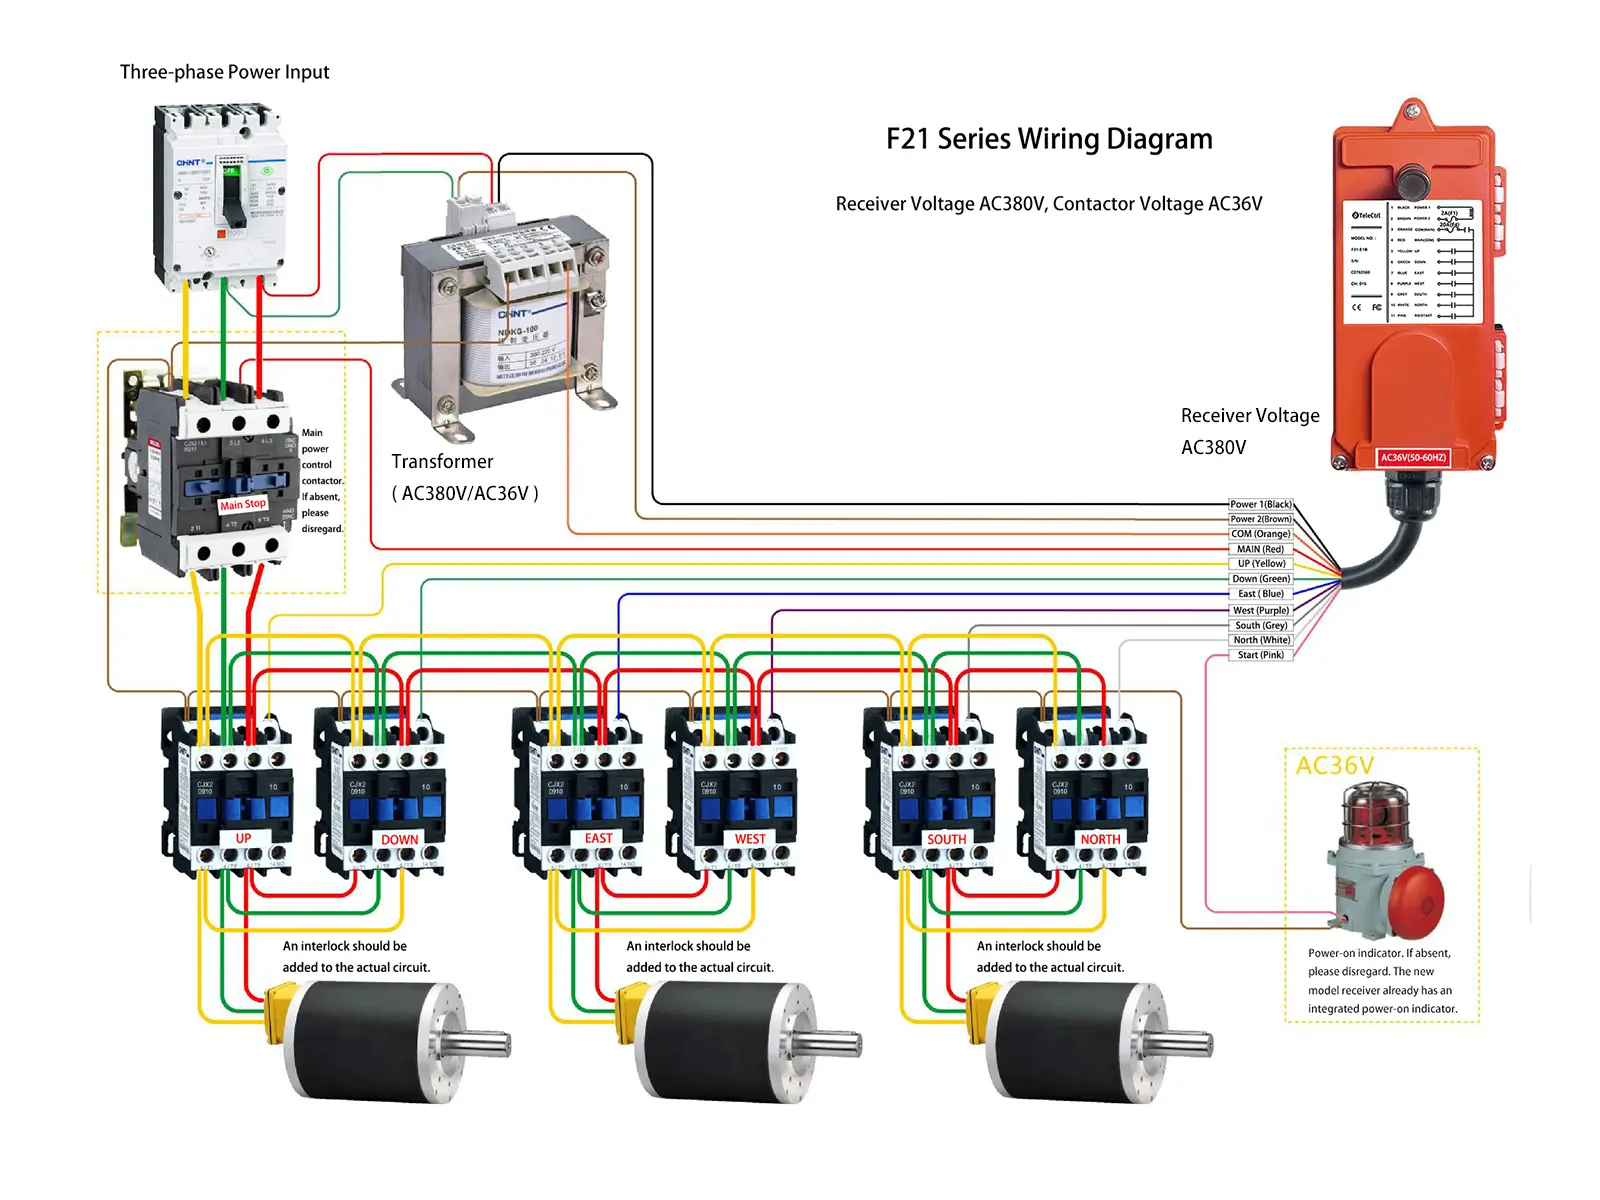
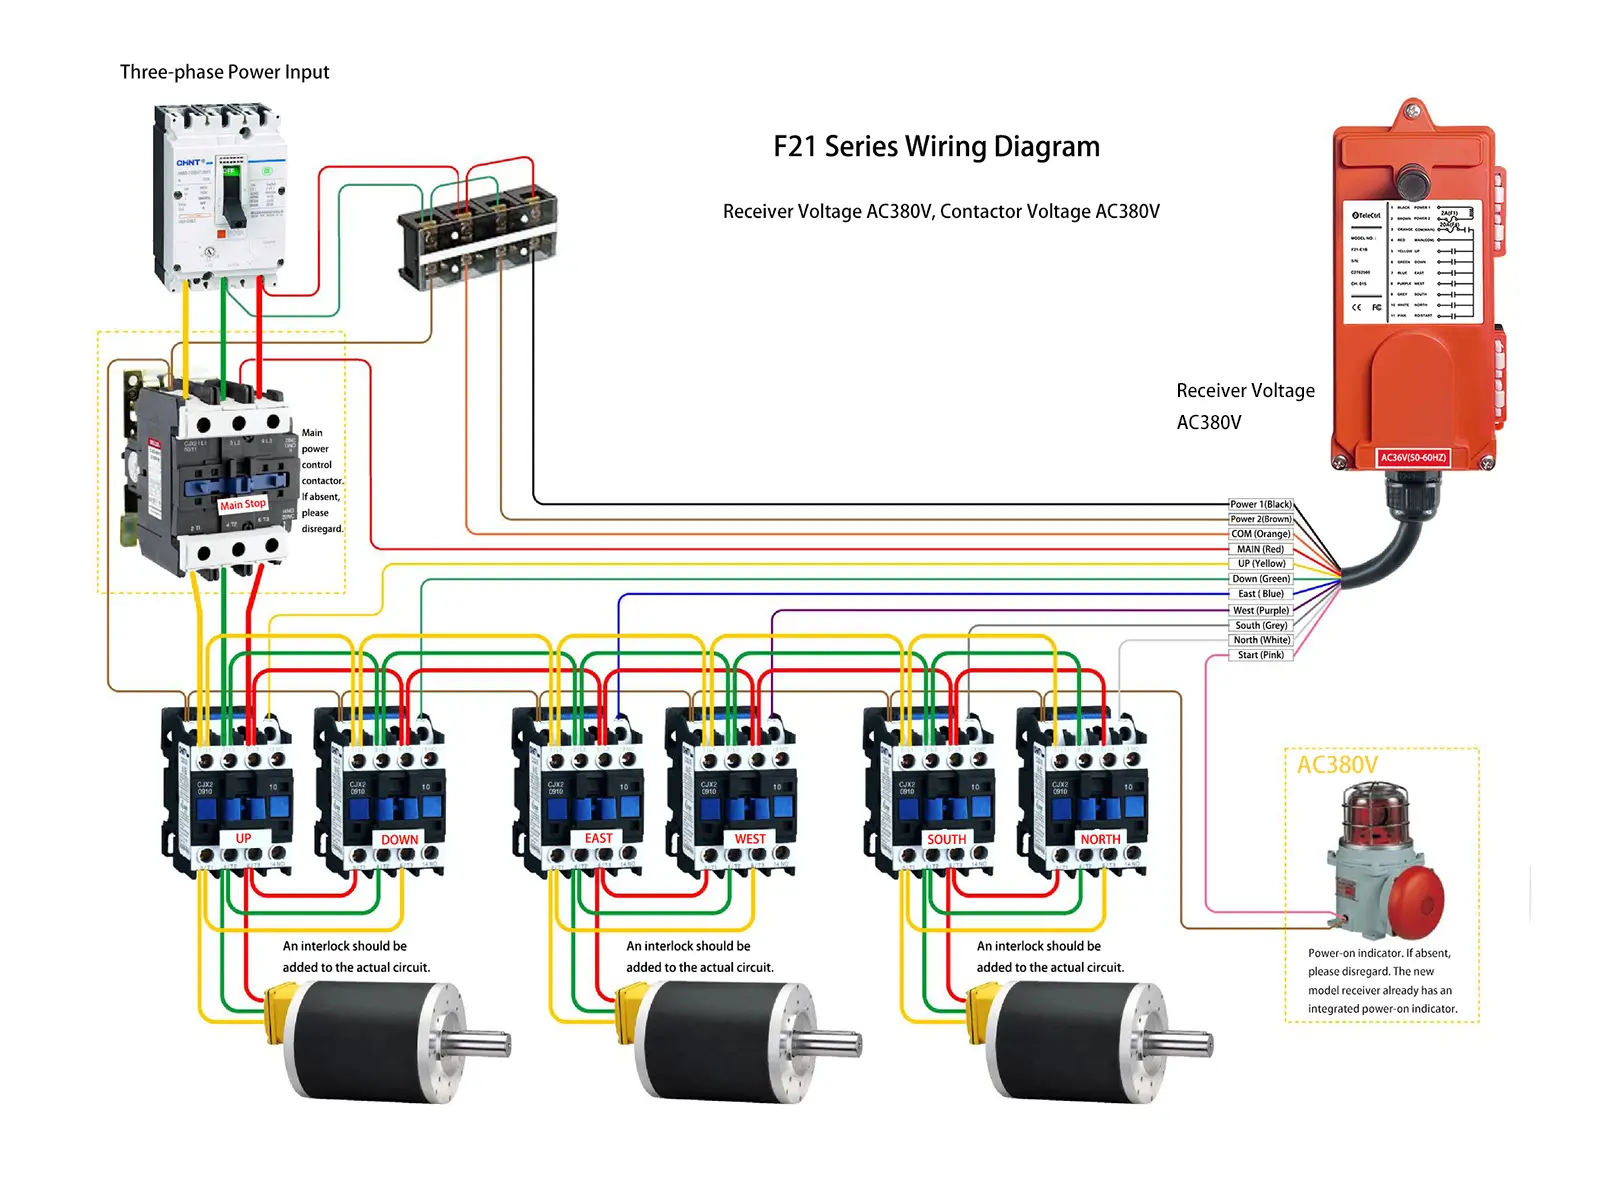
- Review the product manual to understand the basic functions and wiring diagrams of the remote control model. Below is the wiring diagram for the F21-E1B.
Step 2: Wiring
Follow the specific model wiring diagram in the manual to correctly connect and secure the cables. Tighten the clips to ensure a secure connection that will not loosen. After the connection is complete, wrap any unused cable connectors with insulating tape, install the receiver antenna (if external).
For different input voltages, the receiver has different wiring methods, as shown in the diagram below.
Step 3: Install the Receiver
Choose a suitable location to drill holes and fix the receiver. When determining the installation location, consider the following:
- Install away from heat sources, inverters, motors, and other high-power equipment to avoid signal interference. Shielding measures can be taken if necessary.
- Install the receiver in a safe, stable location without metal obstructions. If installing inside a metal cabinet, use an external suction cup antenna to ensure it is not obstructed by metal.
- Choose a safe location to avoid adverse weather, corrosive substances, and mechanical vibrations or impacts.
- Ensure the installation environment temperature meets the product parameter specifications.
Step 4: Test Connections and Safety Check
- Check connections: Recheck all connections to ensure they are secure and correct.
- Power on and test: After powering on, test each control button to ensure the crane moves according to the instructions.
- Debugging: If necessary, debug the remote control to ensure optimal performance.
- Check safety settings: Ensure the remote control’s emergency stop button and other safety features are working properly.
- Train operators: Instruct operators on the use and safety precautions of the remote control to ensure they can operate the equipment correctly.
Video Tutorial for Installing Industrial Radio Remote Controls
For further guidance on the installation of industrial radio remote controls, refer to the following video link:
Common Troubleshooting Tips
If issues arise during installation, refer to the troubleshooting section of the installation manual or visit the “Common Issues and Solutions” page for assistance.
Note: When the controlled equipment connected to the remote requires welding operations or exceeds the voltage and current specified by the remote control, disconnect the connection between the remote and the equipment and isolate them to prevent equipment damage or other safety incidents.
Safety Notice
Upgrading Your Old Equipment
Many older devices or cranes still use wired controllers, which are not only inconvenient but also pose significant safety risks due to the aging and deterioration of the cable insulation.
Upgrading equipment to wireless remote control has great practical significance, with low upgrade costs and easy technical implementation. Here is a simple demonstration:
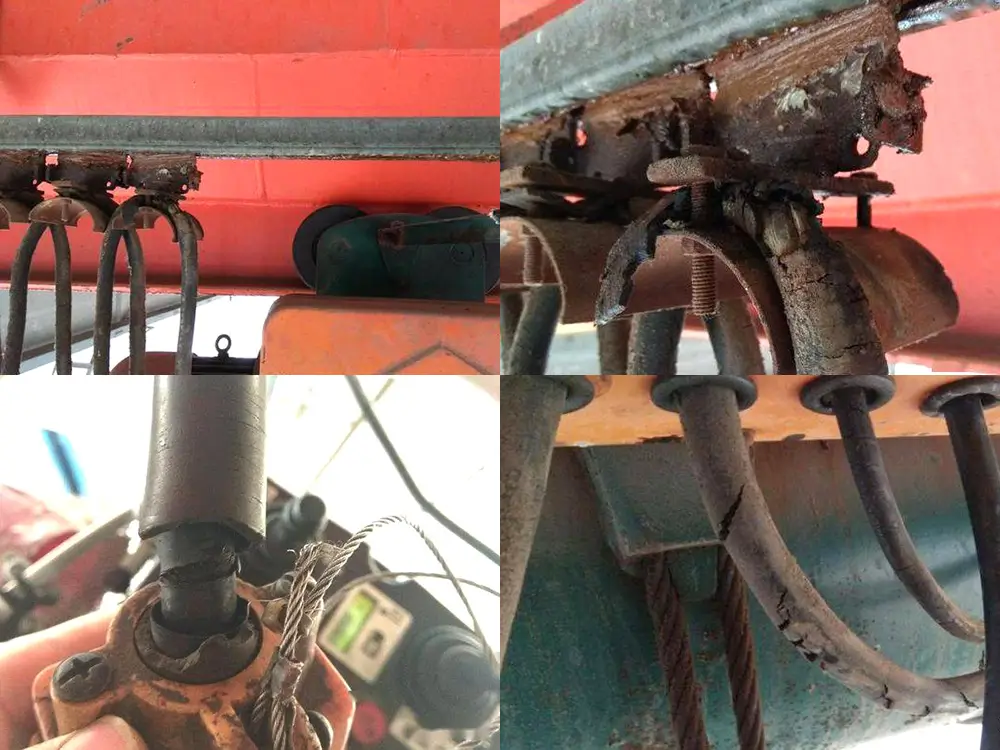
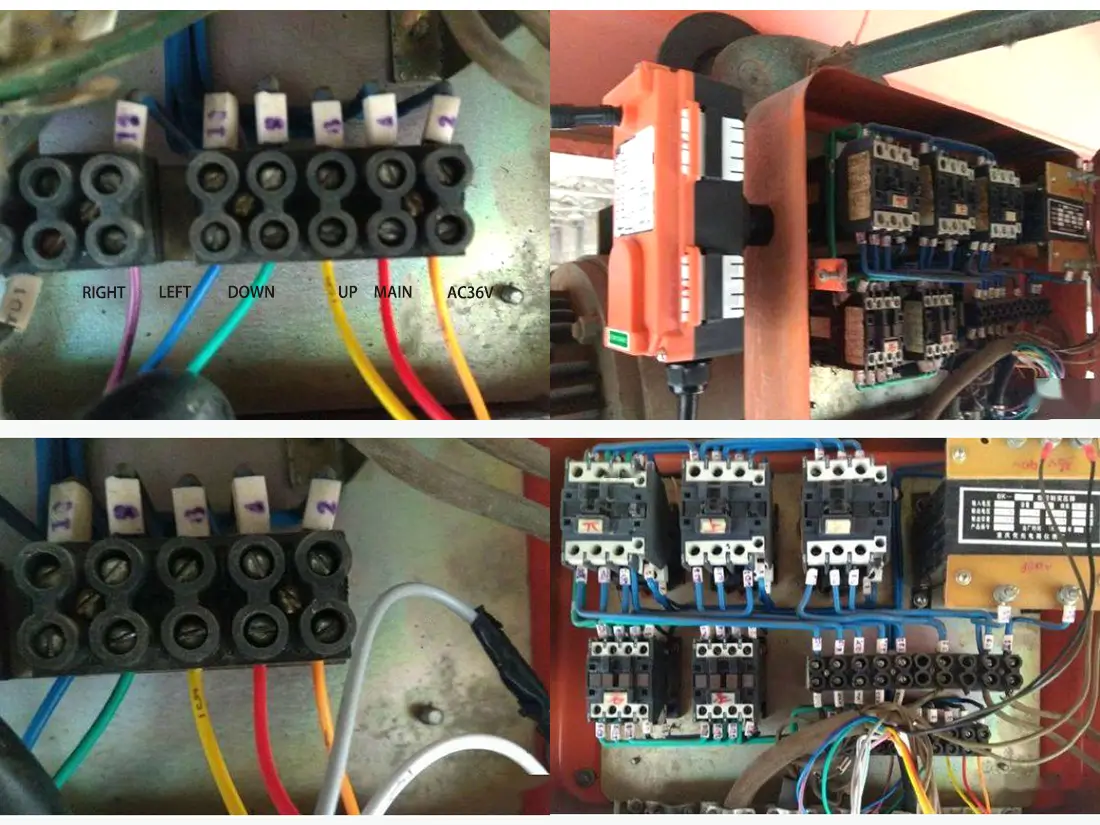
- Open the control box of the old crane. The upper and lower rows of contactors control down, up, main power, right, and left respectively, with the transformer in the upper right corner.
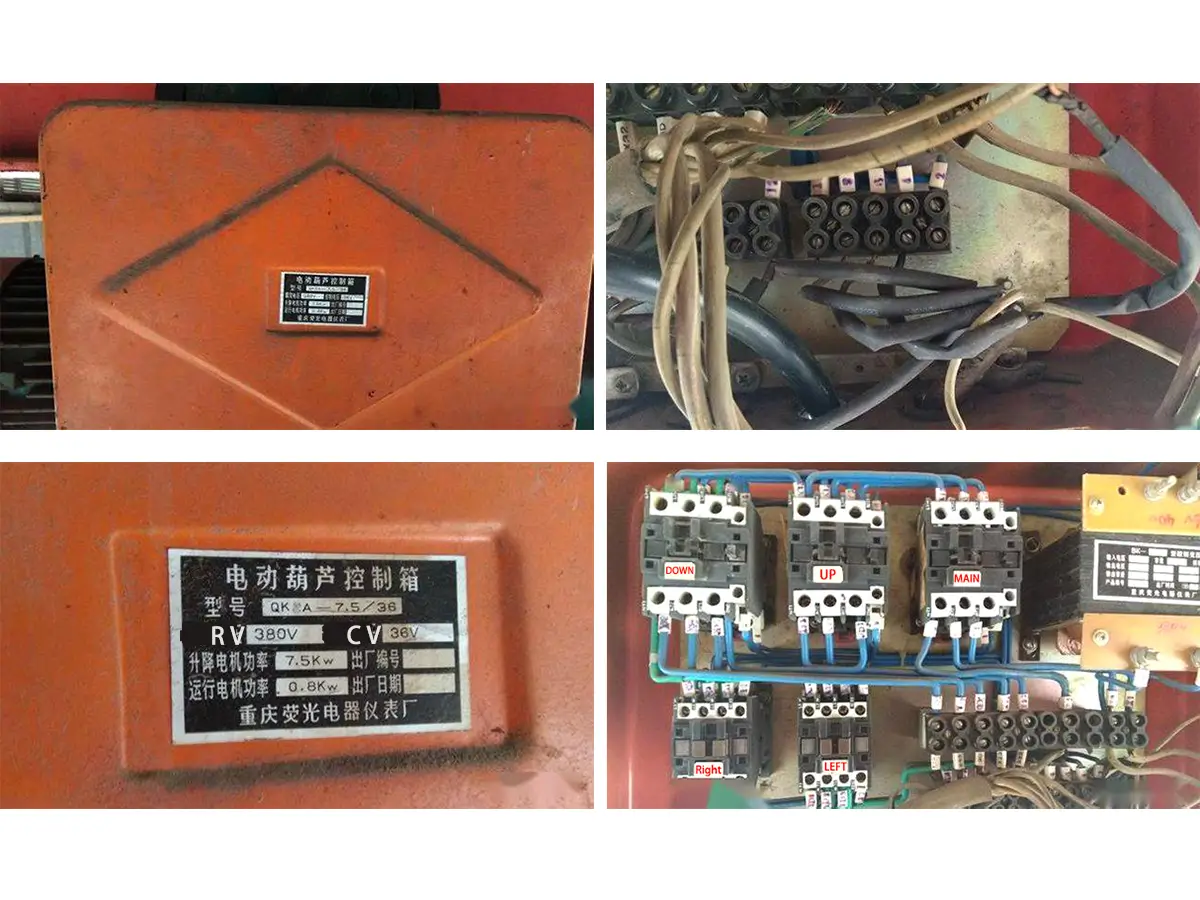
- Following the wiring methods and steps described above, install, connect, and secure the remote control receiver. The installed receiver is shown below:
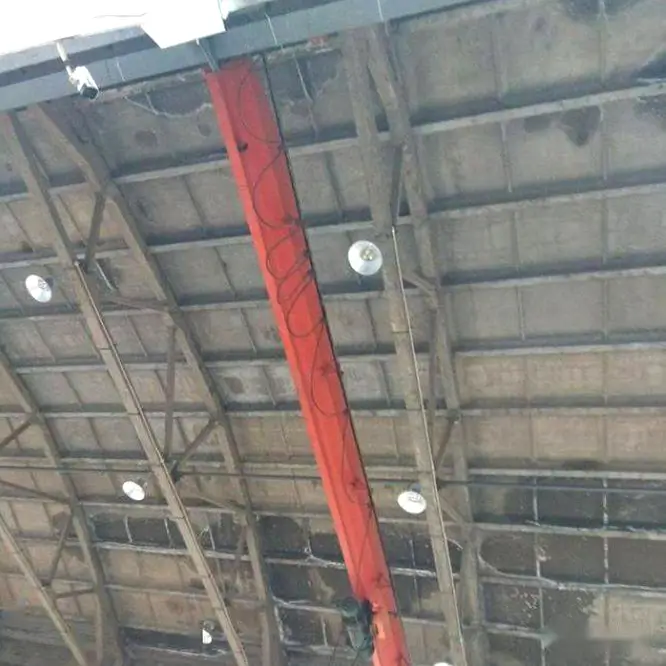
- Power on and test the equipment to ensure it operates correctly.
By using the F21-E1B model as a demonstration and providing an upgrade guide for old equipment, TeleCtrl aims to offer clear guidance for your installation process. By following the steps and precautions mentioned above, you can successfully address most installation and usage issues for industrial radio remote controls. If you still have questions, please contact the TeleCtrl technical support team immediately for safe equipment use.